(Reminder: We're not going to talk about disappearing blog posts, because then I will cry)
Have you ever had a photo you love, nice lighting, nice colors - but then the photo is just slightly blurry?? It happens to me a lot. This is a quick, super easy method of sharpening (and saving) that photo. We'll be using a high pass filter. Have you used one before?? Well, you will now! I'm using CS3, but I'm sure this will work equally well in Elements.
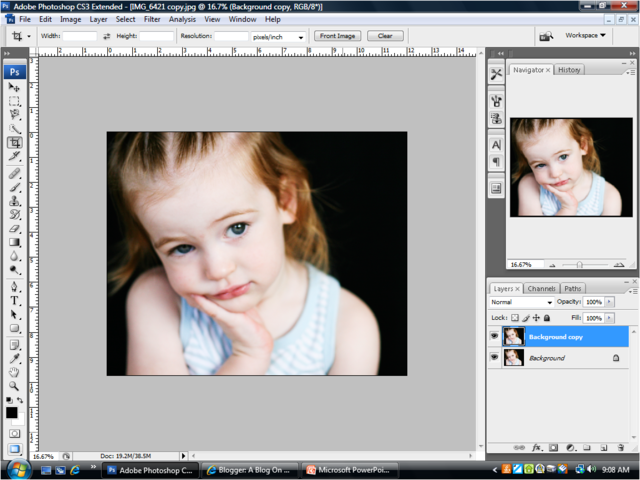
Another random shot of Kate:
You can see it's out of focus. Let's see what we can do to save that. And doesn't she look so interested in this process?
Open your photo in Photoshop. Usually you save sharpening until your last step in Photoshop, so do whatever else you want to do to the photograph first. Me, I'm lazy so I'll do.....um.....nothing.
Now after your fussing around you need to create a duplicate layer of your image. Click Ctrl+J or go to Layer ---> Duplicate Layer.
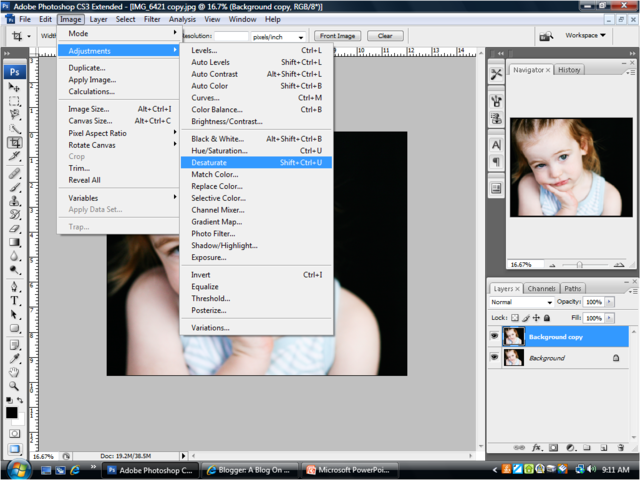
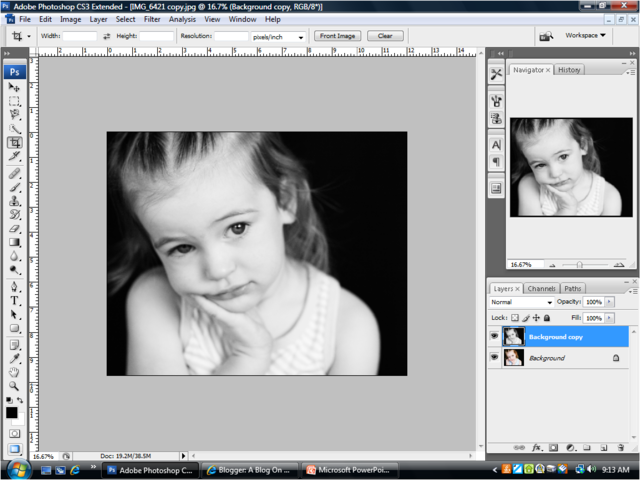
Now we want to turn that layer you just made in black and white. Go to Image --> Adjustments --> Desaturate (or hit Shift+Ctrl+U)
Good job!
That last screen shot? Kind of unnecessary, but I was in the groove.
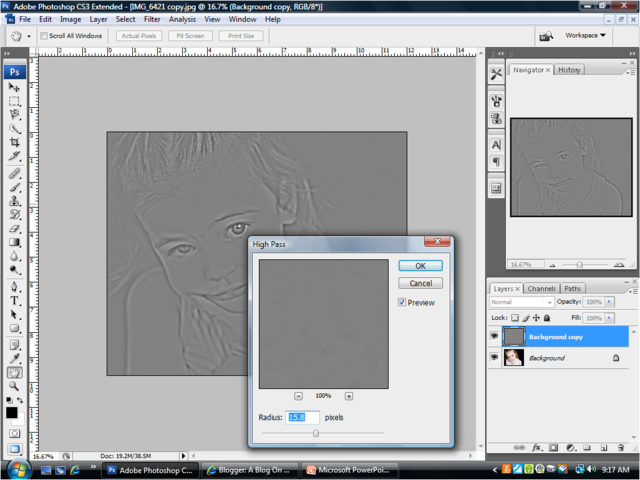
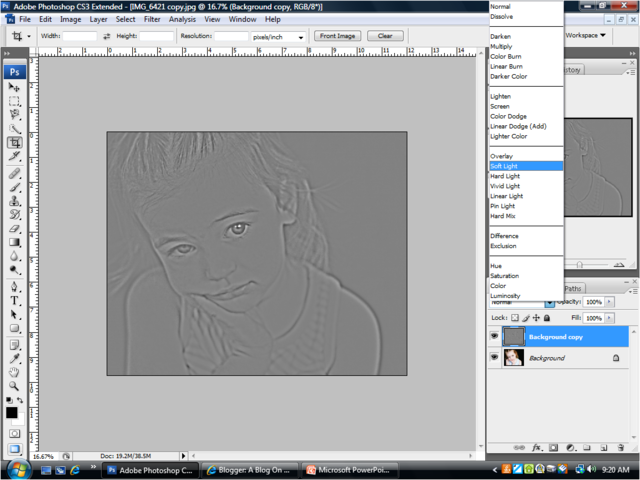
Here's where we're going to sharpen using a High Pass filter. It looks a little freaky, but have faith! Okay, go to Filter --> Other --> High Pass. A screen will pop up, and your image will turn kinda greyish and lineish (these are, of course, highly technical terms) In this little screen, enter a value of 10 in the box beside the word "radius". Click OK.
(okay, so I went a little higher than 10. Mine was like 15.8. I did mine a little higher so you could see the difference. Plus, if it's too much you can always lower the opacity of that duplicate layer you made. I love myself some duplicate layers)
Now we've got to make this freaky photo look normal again. We're going to change the blending mode of the grey highpass layer (the grayish/lineish one) from normal to "soft light" over on your layer's palette. Click on the downward facing arrow beside the word "normal" and click on "soft light".
Ta da!
Okay, so it's a little hard to see on here (and I picked a pretty out of focus picture to begin with) but sometimes it's enough to help your picture out. Here they are side by side:




4 comments:
I'm usually too lazy to use the high pass trick. Then again, my photos don't make it farther than my blog, so it doesn't really matter. I need to get me a nice black backdrop for photos, though. I love it!
Your photos are always so sharp to begin with--it's for us out of focus people!
The backdrop is just black spandex-mix fabric (to keep the wrinkles out!) Best 10 bucks I've ever spent!
Love it! I'm goint to try it today!
That's awesome. I had used some other layering tricks, but never tried the "high pass" by the elements 6 has it. It is in the filter menu, under "others."
Post a Comment